
All photographers that I know love black and white. They discuss tonality, contrast, "snap," and textures. Of course the discussion always goes into how to convert to b/w also. The question that comes up time and time again is actually a fairly simple question. When do you choose back and white over leaving an image color?
This is not as simple as it might seem but today's tools have allowed us to make these decisions quickly during our editing since we can see before and after so quickly. For me personally, I often look at colors and try to do a fast conversion in my head while I am shooting. If I am looking at a scene with a lot of totally different colors then I know instinctively there might be a good black and white there.

An example where black and white seemed logical since the walls were white, the framed print was b/w and everything in the picture was black. Light and shadow were the primary elements that made this image successful.
I have used every tool there is for black and white and I always go back to Silver Efex Pro. I can achieve any effect I want and it is just intuitive for me. Of course, I have been using it since before it's release and I may be a little biased. But the overall feel for me is to use the tools that do the job well that take little or no effort to use. For me this defines Silver Efex Pro from the Nik Collection by Google.


Taken during a workshop in Yellowstone, this "group shot" was ideally suited to convert to b/w. Adding in a funky image border and a bit of toning with sepia helped to give life to an otherwise average look at these photographers getting ready for their day's work.


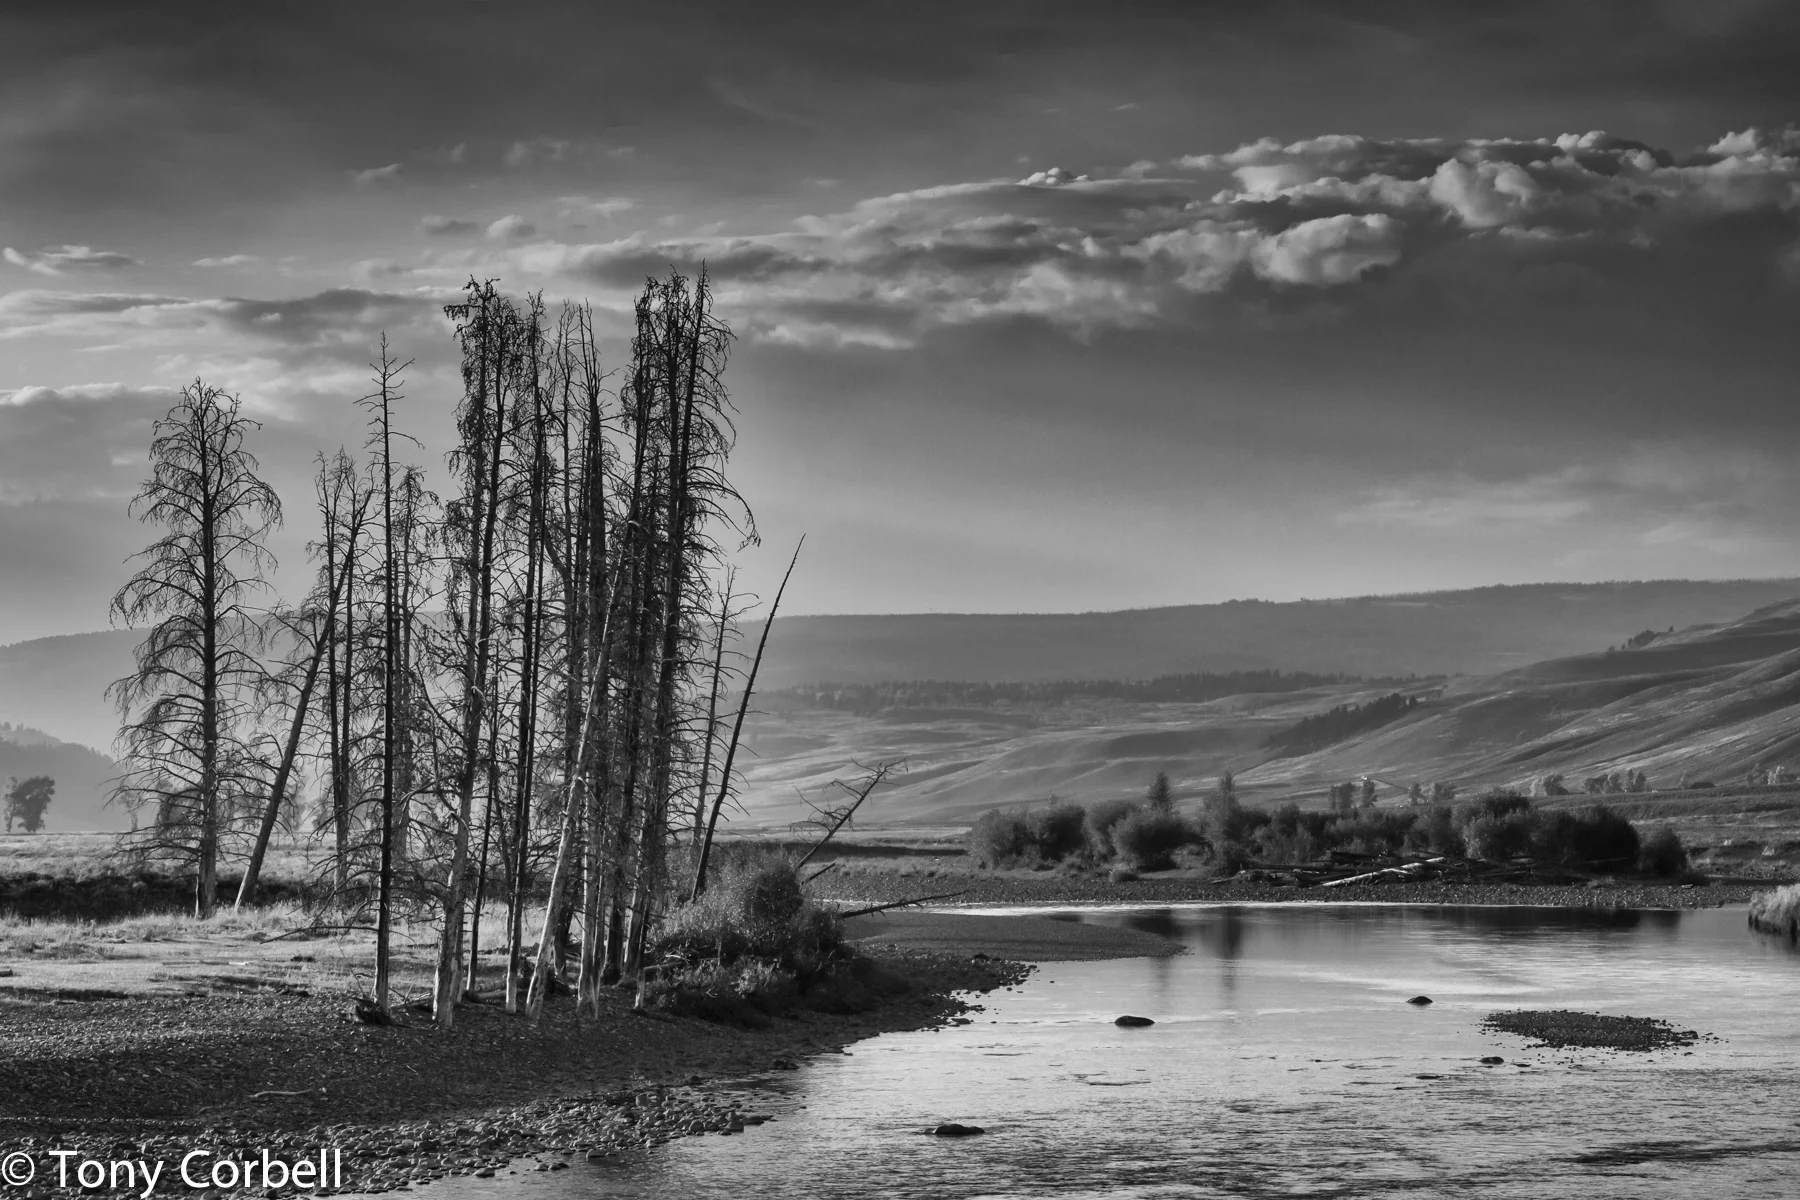
The b/w version of this scene was not what was in my mind at the time I took this image. Seeing the trees sort of "wake up" was a bit of a surprise to me. I was really happy to see this coming together and the final edit only took about three or four minutes total. I relied heavily on Soft Contrast in Silver Efex Pro from Nik Collection by Google.


This beautiful late afternoon scene was almost overlooked for editing. I didn't consider this as a "hero" image until several weeks after the trip ended. After I re-visited the image and gave it a hit of tonal contrast, and structure, the picture started taking on a life of it's own.
In future posts we'll dig a lot deeper into the world of black and white editing and show you a lot of tips and techniques designed to streamline your work. But before we begin the post production effort consider getting in the habit of pre-visualizing how the tonalities you see in your scene might work together in black and white. In fact, think in terms of adding or subtracting localized and selective contrast, overall detail and texture. Does the blue sky meet up with a golden wheat field? Does the color of the model's clothing match or contrast with his or her eye color? All great questions. I have learned to think of color as being a benefit to my picture or not. If color does not add anything to my image, then I immediately think in terms of black and white.
Stay tuned for more on this great topic in the next few weeks as we explore in-depth editing possibilities and preparing files for fine art sales or client use.


Be sure to watch for my upcoming Location Lighting Book or click below to pre-order:

http://tinyurl.com/hcaaghj